So it sat for a couple more weeks, hoping that one of the pinks would reappear. When that didn't happen, I decided to bite the bullet, take out the old stitching, and start over again with new colors. (I still couldn't give up on the pink.) I had been regretting my choice of colors for a quite a while already, so I wasn't too disappointed about that, but this is about when my stitching blahs hit.
On this pattern, the pattern doesn't start to show up until quite a bit more than half the ball is stitched, and I didn't like how it was looking earlier. I did have pictures of the same pattern in progress and finished, and I could see that I was on track, so I kept going, but it took quite a bit of determination.
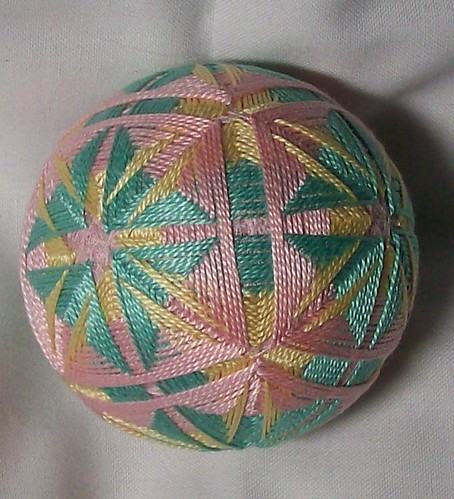
This is a c8 division, and the stitching is layered, one row of each color at a time, building up the pattern. The marking is done with a white sewing thread, hardly visible when you are looking for it, and not visible at all when you are not. There are 6 pink squares, 8 green triangles, and 12 yellow diamonds. After working with one row at a time for a while, you can change things up, skipping a shape in one round or doubling up, so the possibilities are endless. Our stitch-along leader calls it a kaleidoscope ball, because it is constantly changing. I left off several of the diamond rows, and ended with three rows of pink.
It is possible to continue stitching until the "channels" get completely filled up too. That makes a much smoother look, and gives a very different character to the ball.
This type of pattern is fascinating, and I'm so glad I stuck it out.


3 comments:
I'm glad you stuck it out, too. This is gorgeous!
This is a beautiful one. I Love the full-coverage.
Love the colorss on this one! It turned out GREAT I think! Good job!
Post a Comment